AE86 SR-5 to GT-S swap
How to by assassin10000
Ok, for all you newbs out there. Or just anyone who is interested ![]()
Here’s a write-up/pictorial with partial details on how to do a SR-5 to GT-S swap. To either whet your appetite to do the swap, or maybe even scare you away from trying to do it yourself… Note: this is not write-up on a ‘complete’ SR-5 to GT-S swap which would include the interior, trim, badging and other pieces. But a mechanical write-up, basically what is considered the ‘heart & soul’ of what makes the gt-s, a GT-S. (OR the ‘GT’ in europe, or a ‘hachi-roku’ Trueno in japan)
I have no idea why it hasn’t been done already considering there are quite a few people who have done this before. I say partially detailed only because I’m NOT going to detail every last nut/bolt/torque spec/etc that is required to do this right. I’m writing this with the assumption that anyone that IS going to do this swap has some basic mechanical ability and has atleast the ability to install a complete motor into a car. And has access to the Factory Service Manual, either by purchasing, borrowing or downloading one.
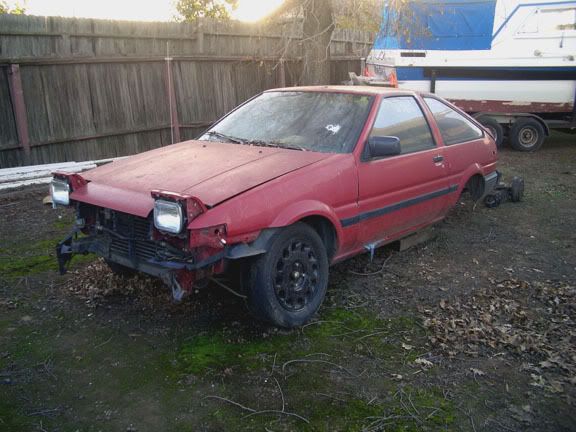
To begin with – Get your SR-5 chassis/shell. And GT-S donor car or parts necessary.
Partial List of parts needed:
1. Engine (complete, w/distributor, manifolds, injectors, alternator, smog equip, oil pressure sensor, coolant outlets/sensors, etc.)
2. Engine harness
3. Throttle cable from GT-S (or cruise system w/cruise cable for a gt-s)
4. MAF sensor
5. Ignitor/Coil
6. Starter (can use SR-5 but it does not have a necessary heat shield and will eventually die)
7. Flywheel & Clutch
8. GT-S bell housing (or whole GT-S trans)
9. Coolant reservoir (GT-S is different)
10. Washer reservoir (if you want it, GT-S is different)
11. Dash harness (w/associated electronics & ecu)
12. Instrument Cluster
13. Fuel pump (don’t worry about the fuel level sender, its the same)
14. Fuel & Brake lines.
15. Front body harness (w/associated electronics – ie head light relay, fuse box, ect)
16. Clutch fluid hard line & slave cylinder
17. Catalytic Convertor
18. Cat-back exhaust (stock or not)
19. Rear body harness
20. GT-S E-brake cables. (Handle and center cable are the same, but rear cables are different.)
21. Complete GT-S rear differential. (including brakes & calipers)
22. Brake proportioning valve if using an SR-5 built before 10/85 (any built after have the same one as the GT-S)
+ Anything I missed.
Note: Some parts swapped over may need the brackets from the GT-S, IE: the coolant reservoir (has a small bracket that bolts the the pass side strut tower)
Or like on the ignitor/coil, my SR-5 didn’t even seem to have the mounting holes for the bracket. So I had to make some out of aluminum stock bought at home depot.
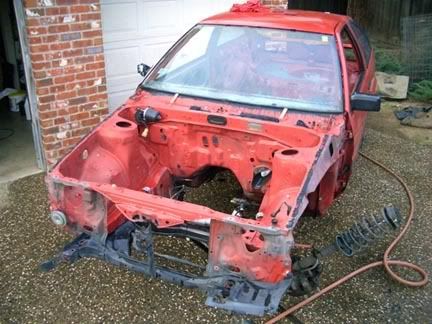
1. A shell.

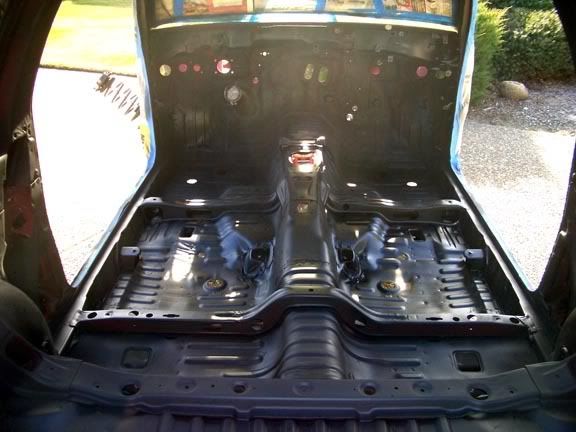
2. Strip the shell. You’ll need to remove:
The engine/transmission.
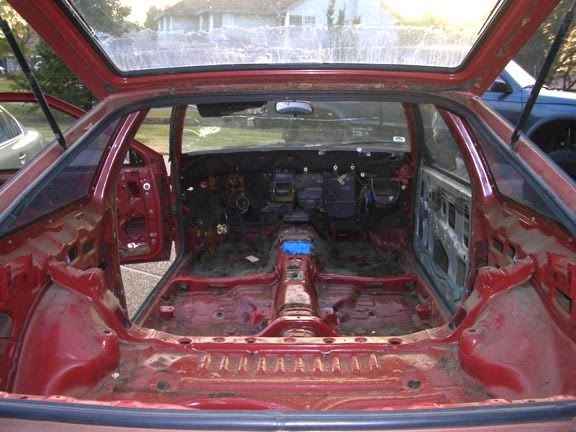
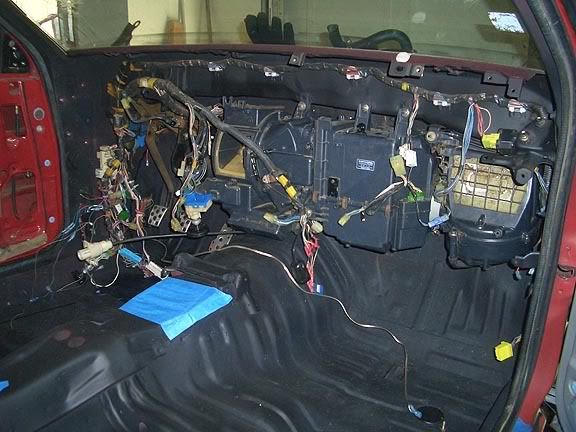
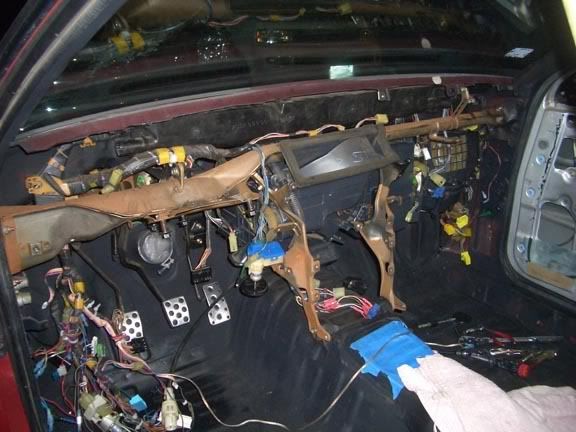
All 4 interior wiring harnesses which will require almost complete dissassembly and removal of the interior with the exception of the hvac assemblies/case (Heater Ventilation & A/C – which is the evaporator, blower motor and heater core).
The brake & fuel lines from the passenger side frame rail where it meets the engine bay to the gas tank, which will also need to be removed (*custom fuel pump & lines can be done instead of using a GT-S gas tank & lines, but this post/write-up will NOT be outlining these options).
The driveline & rear differential.
![]()
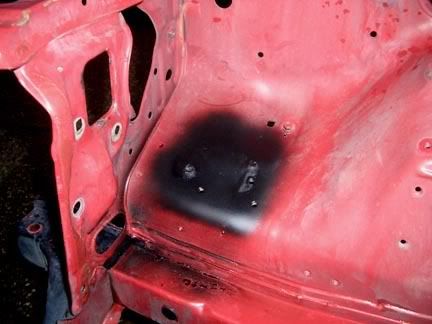
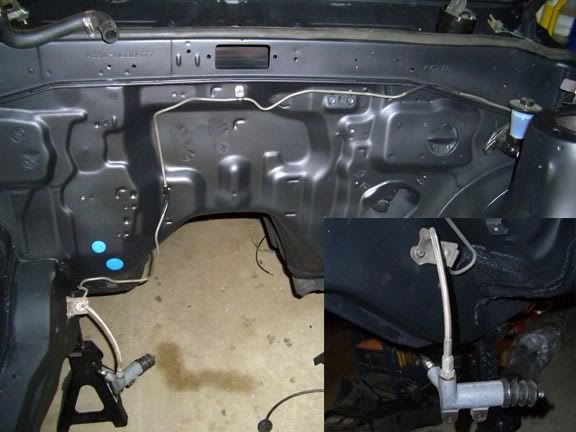
Also, you will need to remove a small bracket that is spot welded in 2 places on the right side front fenderwell area. It is what held the SR-5 washer bottle & coolant reservoir in place at the bottom. It will interfere and is not necessary for the GT-S airbox/filter, it also interferes with the K&N filter kit and possibly the INJEN one as well (but I have no first hand experience with the INJEN intake kits). In the picture below the mount is already removed and I sprayed the exposed spot welds with some black paint to prevent rust.
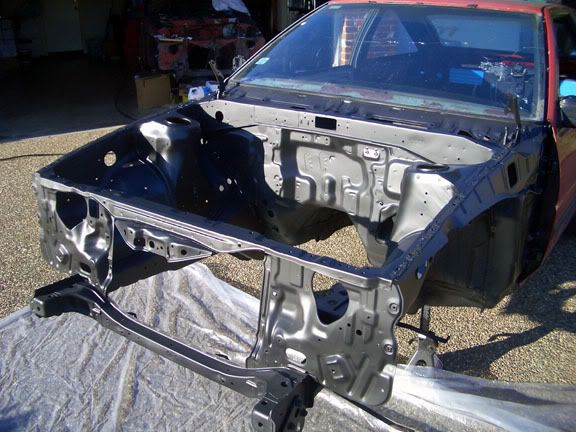
NOTE: if your going to paint your car, interior or engine bay. Now would be the time, or you’ll have to do a lot of it all over. ![]() I did the interior & engine bay, exterior to come later. Here’s a few pics for fun. But this is NOT part of the SR-5 to GT-S swap, and this is all the detail I’m giving here.
I did the interior & engine bay, exterior to come later. Here’s a few pics for fun. But this is NOT part of the SR-5 to GT-S swap, and this is all the detail I’m giving here.
At this point the SR-5 chassis is almost literally just a shell and we can begin the process of swapping the GT-S components.
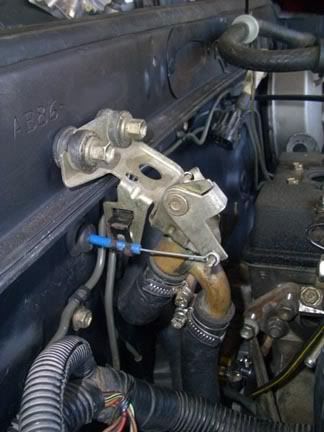
3. Install the clutch hardline, and slave cylinder. If you are feeling cheap the rubber line is the same as the SR-5 one, but I recommend getting a good stainless steel/teflon line. The bracket that holds the line is the same on both SR-5 & GT-S. All you need to do is undo the two 10mm bolts and swap the bracket to the passenger side which is predrilled and threaded for a clutch line bracket.
Note: in this picture none of the brake hardlines are present, makes it easier to see what your going to be changing. But they do need to be present & behind the clutch line due to the way they mount/route.
4. The GT-S throttle cable.

5. The proportioning valve (only if necessary, refer to parts list note)

6. Install GT-S brake & fuel lines. And the gas tank.


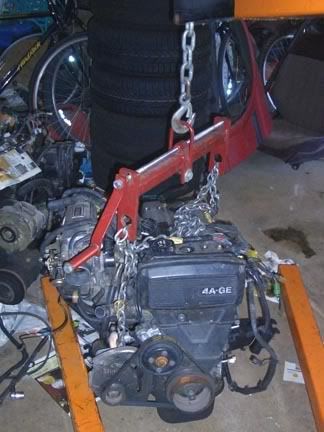
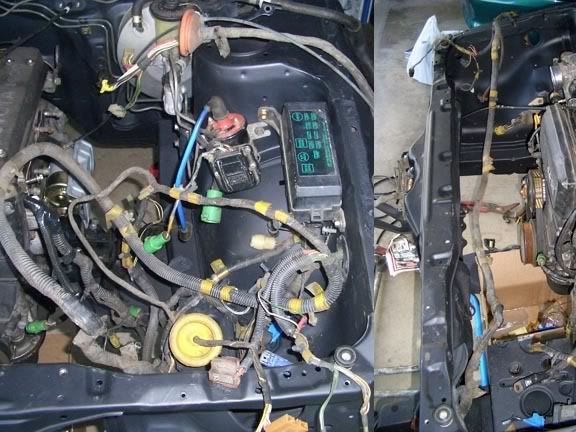
7. The engine & transmission (much easier to install together).
GT-S engine, transmission & wiring harness waiting to be installed.
Note: When removing or installing the engine I recommending remove the rear water outlet with sensors, metal vacuum lines and egr valve w/pipes from the engine. It makes it way easier to remove/install and you won’t break the hard to find BVSV’s.
Installing.
![]()
Installed.

8. Install the dash harness (with interior fuse boxes, relays, etc), dash mount/reinforcement bar, hvac control/radio bracket & hvac parts (defroster & vent piece) that were removed for access to install the GT-S dash wiring harness.
9. Charcoal cannister (recommended, even if you don’t have to worry about emissions testing it doesn’t weigh much and helps keep the environment clean)
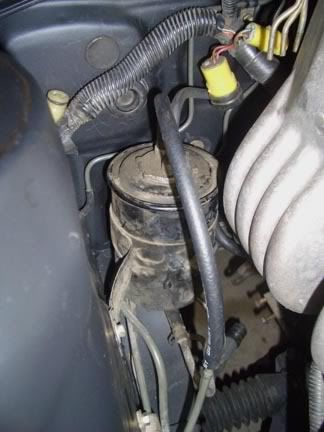
10. GT-S fuel filter. I recommend buying a new one from Toyota, as it also comes with the mount.

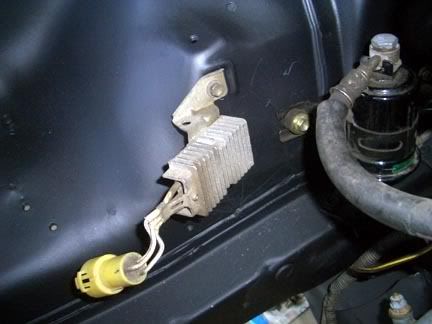
11. Ignition system coil and ignitor. Installed with custom aluminum bracket since the SR-5 does not come with the correct mounting points on the left side inner fender.

12. Injector resistor box. (not listed seperately in the parts list, I consider it part of the engine/harness.)
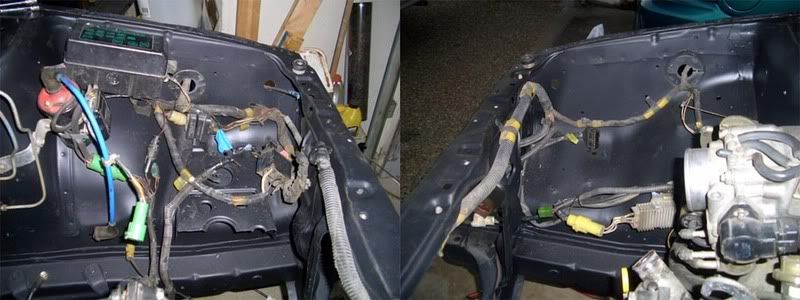
13. Install the front body & engine harness. Includes the engine bay fuse box and alternator wiring.
Installed. (Don’t forget to connect the single wire black plug next to the fuse box, or it won’t start.)
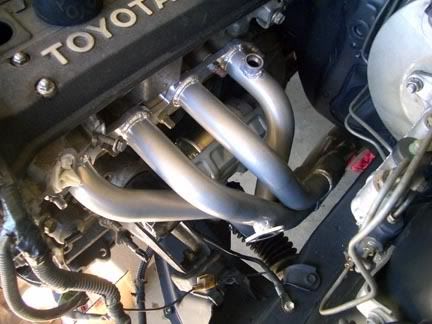
14. Exhaust manifold or header of your choice.
15. Coolant reservoir (remember, you need the GT-S bracket for this)

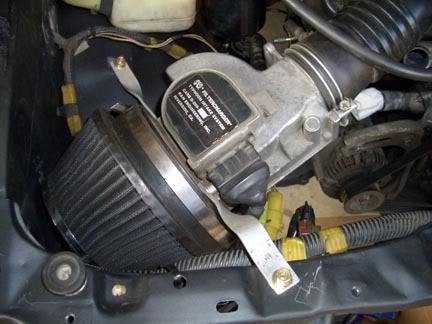
16. Mass Air Flow sensor, in my case with a K&N FIPK kit. But usually done with a stock air box & filter, or any filter kit of your choice (K&N, Injen, hks, or whatever ebay brand you have).
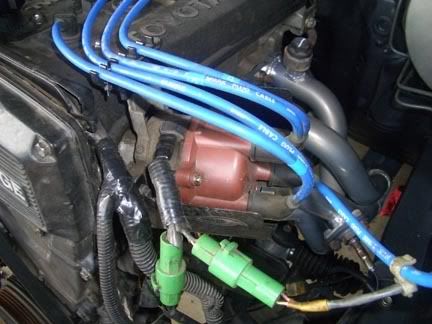
17. Install distributor. Set it at about center, once you have the car warmed up and running you will need to check and set your timing. If you pulled a running GT-S engine mark the distributor with white-out on the cyl head to the mounting ‘ear’ before removing and your timing will be very close to perfect when you reinstall.
18. EGR Valve, vacuum lines and heater control valve w/hoses. Since I had everything out and apart I installed all new vacuum lines (7/64″ size).

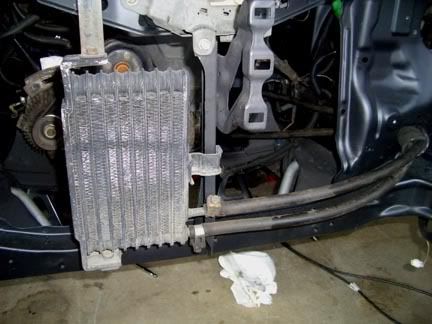
19. Install the OEM oil cooler if you have it, or your own aftermarket setup. This step can be skipped if you aren’t installing one, but I highly recommended an oil cooler for ANYTHING that will see more than daily driver/around town use.
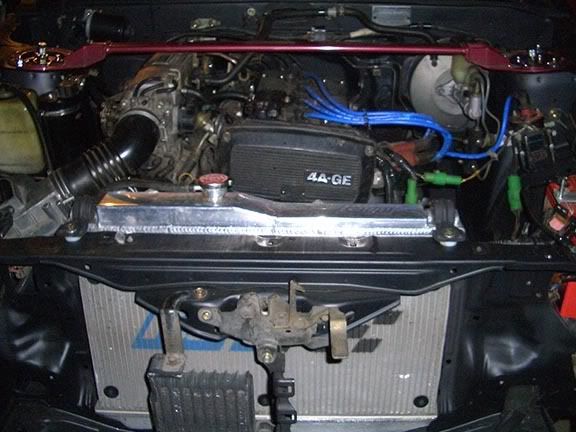
20. Install the radiator, new belts if necessary. And either an electric fan setup, or the OEM fan clutch, fan and shroud.
21. Now we go back to the interior for a little bit, since at this point pretty much everything for the motor is installed.
Install the steering column.
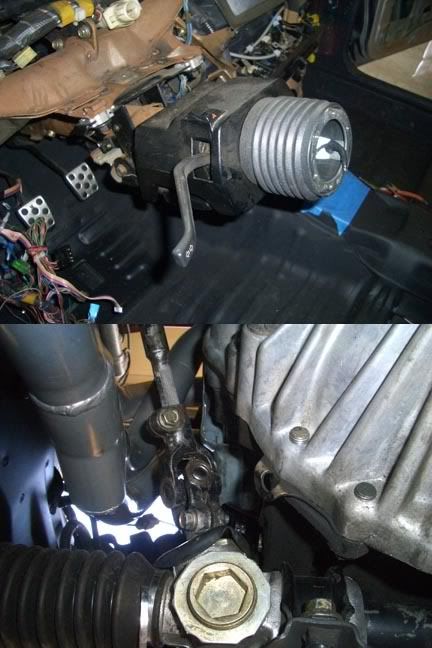
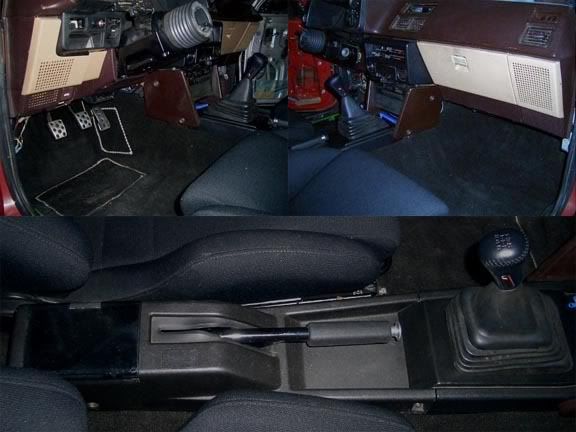
22. The shifter.

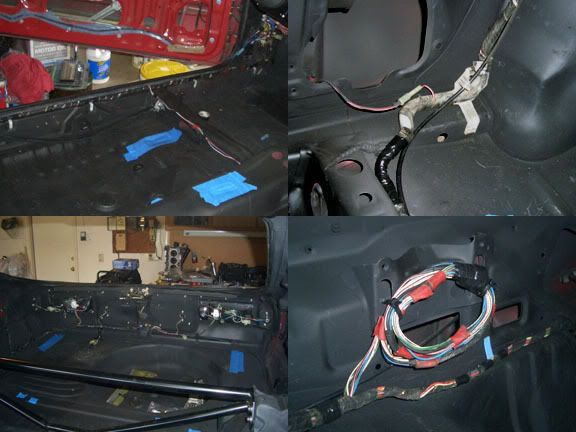
23. The rear interior harness. If you notice I coiled the part of the harness that runs up to the hatch as I do not have a rear defroster, wiper motor, or 3rd brake light on my hatch any longer. A coupe harness can be used on a hatch if you either A) don’t care about those items or B) extend the harness to reach, of course in the case of using a hatch harness in a coupe, just shorten or route as necessary ![]() . Only minor differences, but nothing that will prevent the car from running in any shape or form.
. Only minor differences, but nothing that will prevent the car from running in any shape or form.
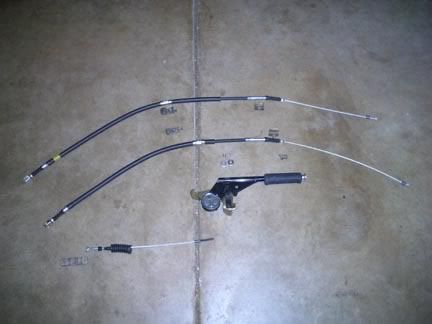
24. GT-S e-brake cables. The handle, cable ‘T’ & middle/short cable are the same for both SR-5 & GT-S, only the two rear (long) cables are different.
Parts.
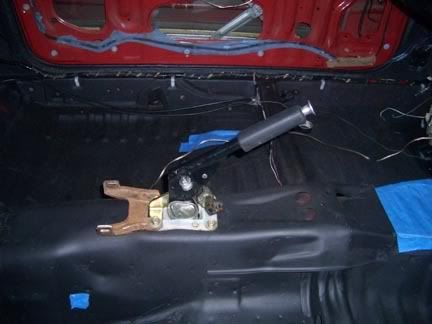
Handle installed.
Cables installed.

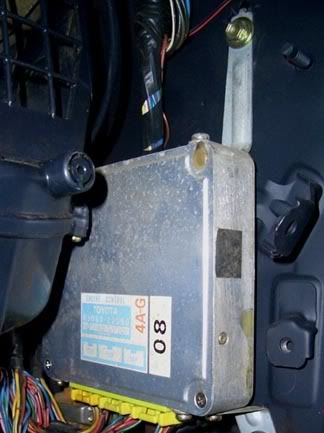
25. Install the GT-S ECU.
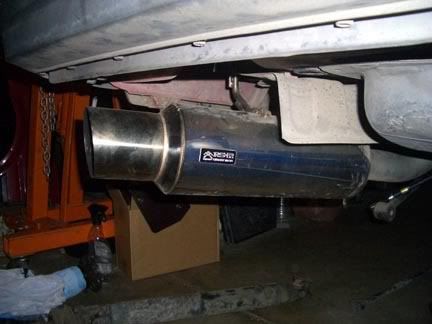
26. Exhaust, stock or of your choice.
27. Battery. (No picture necessary I hope!)
At this point everything necessary for the engine to run is installed and hooked up. Might as well start it up and make sure it’ll run right. Don’t worry, the fun isn’t over yet. Be sure to top off all your fluids, hook up your instrument cluster to the dash harness and crank it over with no spark to ensure there is lubrication/oil available. Make sure there is no check engine light once you get it started and running, to set the timing with the engine at running temp.
28. Now that the fun of having a running GT-S motor is over, time to wrap this thing up.
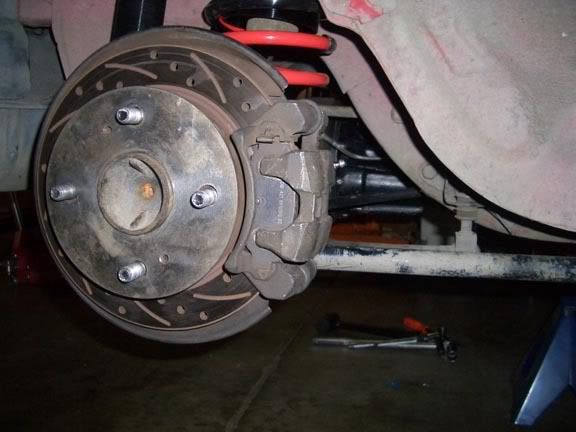
Install the rear differential.
29. Driveline. GT-S recommended, or aftermarket. (But if your not TRD height or lower you can get away with using the SR-5 driveline for a while. From what I remember. Just make sure the driveline is NOT bottoming out against the transmission and you should be ok.)
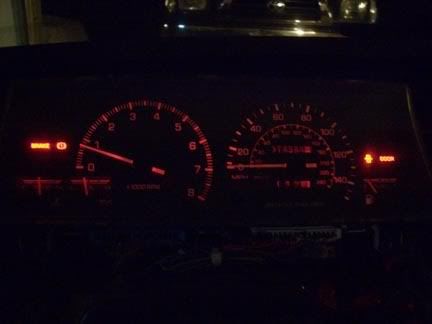
30. Install the instrument cluster and all the interior you want to reinstall. (I make this line sound easy, but the dash and components alone takes about 1-2 hours.)
31. BLEED YOUR BRAKES. Important, that’s why it’s in capitals. It’d also be a good idea to adjust your e-brake before putting the wheels on.
Install your wheels, fenders/bumper/hood or anthing exterior you removed for easier access (I recommend removing it, makes it way easier to install/uninstall everything). Put it on the ground. Check for leaks of any kind. If it all looks good, get it running and go for a test drive.
ENJOY!
Comments, suggestions, tips and questions are welcome.
Andrew
can you tell me the length of the clutch hardline? please.