|
Another danish restoration
|
|
05-14-2014, 10:04 PM
Post: #51
|
|||
|
|||
|
Hi again
A small update from my todo list. This time it is the frp side skirts. As always I took to few pictures, but I'll try to explain how I installed them. ![[Image: AEU86 AE86 - Another danish restoration]](https://dl.dropboxusercontent.com/u/18918496/aeu86/19-SideSkirts/0-DSC00006MCN.JPG "AEU86 AE86 - Another danish restoration") I bought these frp side skirts back in 2009 ![[Image: AEU86 AE86 - Another danish restoration]](https://dl.dropboxusercontent.com/u/18918496/aeu86/19-SideSkirts/1-20140315_115555.jpg "AEU86 AE86 - Another danish restoration") Then I finally got around to install them. ![[Image: AEU86 AE86 - Another danish restoration]](https://dl.dropboxusercontent.com/u/18918496/aeu86/19-SideSkirts/2-20140315_115601.jpg "AEU86 AE86 - Another danish restoration") Used a jack to see what it would look like ![[Image: AEU86 AE86 - Another danish restoration]](https://dl.dropboxusercontent.com/u/18918496/aeu86/19-SideSkirts/3-20140315_115635.jpg "AEU86 AE86 - Another danish restoration") That looks great, so on to painting them. ![[Image: AEU86 AE86 - Another danish restoration]](https://dl.dropboxusercontent.com/u/18918496/aeu86/19-SideSkirts/3-20140315_120738.jpg "AEU86 AE86 - Another danish restoration") As always when painting stuff. Clean the parts very well. I drilled the holes I would be using before painting. I only ended up using the top most four holes. ![[Image: AEU86 AE86 - Another danish restoration]](https://dl.dropboxusercontent.com/u/18918496/aeu86/19-SideSkirts/4-20140323_133056.jpg "AEU86 AE86 - Another danish restoration") I ordered a set of rubber trim via eBay. I think they were from Canada. A bit expensive with taxes and everything, but they work and look good. They are not original Toyota. The original profile is a bit different. ![[Image: AEU86 AE86 - Another danish restoration]](https://dl.dropboxusercontent.com/u/18918496/aeu86/19-SideSkirts/5-20140323_131132.jpg "AEU86 AE86 - Another danish restoration") I mounted the rubber trim with the included glue. Let it set before doing anything else. ![[Image: AEU86 AE86 - Another danish restoration]](https://dl.dropboxusercontent.com/u/18918496/aeu86/19-SideSkirts/5-20140323_140325.jpg "AEU86 AE86 - Another danish restoration") The end result. A pair of painted side skirts with the rubber trim on. Perfect. I didn't manage to take any pictures during the installation process, but here is how I did it. - First. Get a buddy to help you! - Hold up the side skirt, push it as much forward as possible - Use selftapping screws in the top four holes. Don't tighten them yet. - I actually removed the screws again to put in some rust protection. Tighten the screws now. - Remove the wheels - I used one or two selftapping screws at the back (depending on how warped the frp is). - Since I have frp front fenders I tried to use two treaded rivits (6mm) and then two bolts to hold the side skirt in place. - Stand back and watch the results :-) - A final touch is some black rust protection on all the shiny screws. ![[Image: AEU86 AE86 - Another danish restoration]](https://dl.dropboxusercontent.com/u/18918496/aeu86/19-SideSkirts/6-20140412_110207.jpg "AEU86 AE86 - Another danish restoration") ![[Image: AEU86 AE86 - Another danish restoration]](https://dl.dropboxusercontent.com/u/18918496/aeu86/19-SideSkirts/7-20140412_110222.jpg "AEU86 AE86 - Another danish restoration") ![[Image: AEU86 AE86 - Another danish restoration]](https://dl.dropboxusercontent.com/u/18918496/aeu86/19-SideSkirts/8-20140412_110234.jpg "AEU86 AE86 - Another danish restoration") I'm really happy with the result and now completely ready for the summer trips. AE86 - 4AGE - 1984 My project - http://www.aeu86.org/viewtopic/another-d...on/t/13190 |
|||

|


|
05-15-2014, 08:57 AM
Post: #52
|
|||
|
|||
|
Another danish restoration
Nice work

|
|||
|
|
|
09-30-2014, 06:25 PM
Post: #53
|
|||
|
|||
|
Another danish restoration
Hi again
It is about time for me to update this project thread/blog. The last post is from May and a lot has happened since then. The biggest post will be arriving soon so stay tuned :-) First off I have a few small posts. I haven't been driving to that many events during the summer. You'll see why later. However I did manage to get away to some meets and street races in the early summer. ![[Image: AEU86 AE86 - Another danish restoration]](https://dl.dropboxusercontent.com/u/18918496/aeu86/20-SummerTrips/1-20140522_201717.jpg "AEU86 AE86 - Another danish restoration") The first picture is taken on the way home from a meeting with all kinds of cars. New and old and all kinds of nationalities. There is always something exiting to look at. Everything from small minis to huge Cadillacs. The is a broneup (bro line up) in front of the local Burger King. The yellow Italian is a smidge faster than the two others ;-) ![[Image: AEU86 AE86 - Another danish restoration]](https://dl.dropboxusercontent.com/u/18918496/aeu86/20-SummerTrips/2-20140531_101427.jpg "AEU86 AE86 - Another danish restoration") ![[Image: AEU86 AE86 - Another danish restoration]](https://dl.dropboxusercontent.com/u/18918496/aeu86/20-SummerTrips/3-20140531_101439.jpg "AEU86 AE86 - Another danish restoration") These images are from a meet called Gråsten oldtimer run. Again lots of different cars from the early 19 hundreds up till 1984. Unlike last year the car didn't get filled with water so that was a plus. On my way in a guy came by, gave me a thumbs up and said "Nice playstation car". Psssst. NERD... Ok, I also bought one in every version of Gran Tursimo I owned :-) I went to several other car releated events during the summer but not any where I brought the car. I won't bother you with those stories. The next post will be about the fog lights I have installed. AE86 - 4AGE - 1984 My project - http://www.aeu86.org/viewtopic/another-d...on/t/13190 |
|||
|
|
|
10-22-2014, 09:45 PM
Post: #54
|
|||
|
|||
|
Another danish restoration
Hi again.
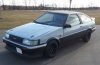
This time I will show some pictures of me installing fog lights on my 86. Why the fog lights? Since I mostly drive during the summer I don't actually need the extra light. However I like the boxy look I have given the car and I think that the fog lights when put out in the lower corners makes the car look really good. So here is what I did. ![[Image: AEU86 AE86 - Another danish restoration]](https://dl.dropboxusercontent.com/u/18918496/aeu86/21-FogLights/1-20140710_203226.jpg "AEU86 AE86 - Another danish restoration") Here is a set of old Hella fog lights I had laying around. Time to put them to good use. ![[Image: AEU86 AE86 - Another danish restoration]](https://dl.dropboxusercontent.com/u/18918496/aeu86/21-FogLights/2a-Homemade.png "AEU86 AE86 - Another danish restoration") Since the bumber isn't straight I made these triangular washes which when installed would point the fog light mount stright. ![[Image: AEU86 AE86 - Another danish restoration]](https://dl.dropboxusercontent.com/u/18918496/aeu86/21-FogLights/2-20140710_203244.jpg "AEU86 AE86 - Another danish restoration") Measure twice, drill once. Here the lights are installed and I'm pulling cabels all around the car. The light "rests" on the lip. ![[Image: AEU86 AE86 - Another danish restoration]](https://dl.dropboxusercontent.com/u/18918496/aeu86/21-FogLights/3-20140920_142138.jpg "AEU86 AE86 - Another danish restoration") All cables are neatly arranged in the engine compartment. Relays and everything. I decided to add a button in the center console so that I have the possibility to turn them off. ![[Image: AEU86 AE86 - Another danish restoration]](https://dl.dropboxusercontent.com/u/18918496/aeu86/21-FogLights/4-20140719_211725.jpg "AEU86 AE86 - Another danish restoration") Here I am at the local Saturday evening street race. I think the result is quite good  Driving small country road during the night is a real pleasure now. They really light up the place. AE86 - 4AGE - 1984 My project - http://www.aeu86.org/viewtopic/another-d...on/t/13190 |
|||
|
|
|
02-01-2015, 12:03 PM
Post: #55
|
|||
|
|||
|
Another danish restoration
Hi all 86 fans.
During the summer 2014 some friends and I decided to do a road trip around Europe. This post is about this trip. The premisses would be that we would drive our old cars and so we did. We would drive a Volvo 142 and my Corolla AE86. Also we would try not to use the motorway where ever possible. During the initial planning during the winter of 2014 we talked about going around Germany visiting various car manufactures and their car museums. The plan changed a bit though. We discovered that the ferry between Harwich and Esbjerg would shut down by the end of 2014. If we were to take our cars to Britain it would be now of never. We decided to drive to Amsterdam and then to Britain via Eurotunnel. We would then drive around Britain and finally take the ferry back to Denmark. Let the Epic Euro trip begin :-) ![[Image: AEU86 AE86 - Another danish restoration]](https://dl.dropboxusercontent.com/u/18918496/aeu86/22-EpicEuroTrip/13-Silly%20map.png "AEU86 AE86 - Another danish restoration") This is a crude map of the route we took through Denmark, Germany, Netherlands, Belgium, France and Britain. The entire trip was about 2700 km. My odometer said 3000 km, but using GPS we could calculate that the smaller wheels on the car gave an error of about 10%. ![[Image: AEU86 AE86 - Another danish restoration]](https://dl.dropboxusercontent.com/u/18918496/aeu86/22-EpicEuroTrip/01-20140816_055429.jpg "AEU86 AE86 - Another danish restoration") ![[Image: AEU86 AE86 - Another danish restoration]](https://dl.dropboxusercontent.com/u/18918496/aeu86/22-EpicEuroTrip/02-20140816_055447.jpg "AEU86 AE86 - Another danish restoration") This is just before we are leaving. I'm waiting for my friends to arrive. The car is packed and ready to go. Both cars had packed various tool and what not should anything happen. And of course also some duct tape, zip ties, extra petrol, oil and water. Especially the water came in handy later... We had packed a tent so that we could drive all day and just camp out when ever we felt like it. We had also booked some hotels along the way. Quite nice since it was pretty cold during the night even though it was mid august. ![[Image: AEU86 AE86 - Another danish restoration]](https://dl.dropboxusercontent.com/u/18918496/aeu86/22-EpicEuroTrip/03-20140816_084403.jpg "AEU86 AE86 - Another danish restoration") ![[Image: AEU86 AE86 - Another danish restoration]](https://dl.dropboxusercontent.com/u/18918496/aeu86/22-EpicEuroTrip/04-20140816_220709.jpg "AEU86 AE86 - Another danish restoration") Here we are in Amsterdam. We had rented a lovely little apartment here. We spend a whole day in the city walking around and just sight seeing. What a beautiful city. I'm definitely going back there someday. The cars are holding up just fine. They use a little oil and water, but nothing serious. ![[Image: AEU86 AE86 - Another danish restoration]](https://dl.dropboxusercontent.com/u/18918496/aeu86/22-EpicEuroTrip/05-20140818_172945.jpg "AEU86 AE86 - Another danish restoration") Taking the Eurotunnel across the channel is so easy I would recommend it all who what to go to England and drive around. All in all I think the train trip was about 45-60 min. A small tip: Buy your tickets in advance and save a lot of money! ![[Image: AEU86 AE86 - Another danish restoration]](https://dl.dropboxusercontent.com/u/18918496/aeu86/22-EpicEuroTrip/06-20140819_093458.jpg "AEU86 AE86 - Another danish restoration") The first day in England we just drove and drove to get as far west as possible. We ended up finding a hotel for the night since all the camping sites we found were closed because of the late hour. The next morning we drove to the National motor museum at Southampton (http://www.beaulieu.co.uk/). Great collection of cars and motorcycles and the trip there was very beautiful. After that we headed for Cheddar Gorge where we would camp out for the night. ![[Image: AEU86 AE86 - Another danish restoration]](https://dl.dropboxusercontent.com/u/18918496/aeu86/22-EpicEuroTrip/07-20140820_090011.jpg "AEU86 AE86 - Another danish restoration") What a view! We could pick any spot we wanted so we took this. Next we drove to Cheddar Gorge (http://www.cheddargorge.co.uk/). This is definitely also worth a visit if you enjoy nature and old caves. After Cheddar Gorge we drove into Wales to see a small hill called Pen y Fan. Once again, WOW. What a sight. Due to lack of time we didn't reach the top of the hill, but the view and silence there were breathtaking. We drove back to England and headed for Stoke-on-Trent where we would camp for the night. Out mission here was to go the biggest amusement park in England called Alton Towers (https://www.altontowers.com/). They had some serious roller coasters and water rides. ![[Image: AEU86 AE86 - Another danish restoration]](https://dl.dropboxusercontent.com/u/18918496/aeu86/22-EpicEuroTrip/08-20140821_185850.jpg "AEU86 AE86 - Another danish restoration") And speaking of water rides. Yes, that is my shoes and socks hanging out for drying! The reason for this stop is that there was a rattling noise from the Volvo. We couldn't find ant issues so we drove on. When we got home we found out that one of the links for the prop shaft had worn and broken. We were very happy that this didn't break into total bits on the trip. ![[Image: AEU86 AE86 - Another danish restoration]](https://dl.dropboxusercontent.com/u/18918496/aeu86/22-EpicEuroTrip/09-20140822_092623.jpg "AEU86 AE86 - Another danish restoration") Here we have landed in Liverpool right next to Enfield stadium. I'm not a football fan at all, but our host at the hotel was and boy did he have some stories to tell  The next day we went into Liverpool to shop and try out some of the local pubs. Cheers. This was a great city and I really enjoyed it. BTW if you like The Beatles this is the place to be. After a good nights sleep we headed for Harwich International Port. ![[Image: AEU86 AE86 - Another danish restoration]](https://dl.dropboxusercontent.com/u/18918496/aeu86/22-EpicEuroTrip/10-20140823_112312.jpg "AEU86 AE86 - Another danish restoration") Some say that is the Corolla but I don't recall ;-) The engine was all of the sudden very hot so I pulled over immediately. It was just pissing with water all over the place. The water pump had finally given in. We are about 150 km from the ferry and we just had to get there in time. I added some fresh water and were able to drive on. Luckily we managed to get to the ferry without any more problems. ![[Image: AEU86 AE86 - Another danish restoration]](https://dl.dropboxusercontent.com/u/18918496/aeu86/22-EpicEuroTrip/11-20140823_131755.jpg "AEU86 AE86 - Another danish restoration") Finally we arrived at the ferry. We added some more water and oil and were able to get home to Denmark. We were very tired now and looking forward to the 18 hour trip by sea. The final 150 km in Denmark from Esbjerg to home would be a breeze compared to the rest of the trip. As I wrote before we drove 2700 km. The old trusty Corolla did an average of 13,5 km/l (including error correction) which is more than approved. The water pump is dead but that is also the only mechanical thing that went wrong with it. Other that that it just drove and drove. Looking back, it is a trip I will never forget. The places we saw, the people we met. It was a fantastic trip and truly a once in a life time thing going around UK like that. Driving the old cars only made the trip even more memorable. The next post will be me changing the water pump and other engine bits and bobs. Cheers. AE86 - 4AGE - 1984 My project - http://www.aeu86.org/viewtopic/another-d...on/t/13190 |
|||
|
|
|
02-01-2015, 09:50 PM
Post: #56
|
|||
|
|||
|
Another danish restoration
Nice journey you had!
Next time you visit Amsterdam you certainly have to give us a call and we could perhaps arrange a mini-meet in/near Amsterdam.
1983 - AE86 Sprinter Trueno - import project 2013 - Honda Civic sport - daily driver 2004 - AEU86 dot ORG - daily domain Support our forum, buy from the AEU86 shop: ![[Image: AEU86 AE86 - Another danish restoration]](https://www.aeu86.org/sticker-banner-468.gif "AEU86 AE86 - Another danish restoration")
|
|||

|

|
02-04-2015, 09:14 PM
(This post was last modified: 02-06-2015 10:18 PM by Duze.)
Post: #57
|
|||
|
|||
|
Another danish restoration
Hi
I don't know why I didn't think about that. I always enjoy seeing other AE86's. I'll remember next time :-) Once again another post with lots of pictures. I always enjoy lots of pictures. I hope you do to. If you read the earlier post you'll know that my water pump was dead. Since I bought the car back in 2005 I have never actually done any maintenance on the engine besides changing the oil!!! So I decided to give the old 4AGE a good 10 year service. This would include the following parts being changed:
While changing the parts I alos decided to do some general cleaning of the engine bay. ![[Image: AEU86 AE86 - Another danish restoration]](https://dl.dropboxusercontent.com/u/18918496/aeu86/23-EngineService/01-20140920_142012.jpg "AEU86 AE86 - Another danish restoration") Leaky water pump. Gotta go. ![[Image: AEU86 AE86 - Another danish restoration]](https://dl.dropboxusercontent.com/u/18918496/aeu86/23-EngineService/02-IMG_20150124_104813.jpg "AEU86 AE86 - Another danish restoration") These are all the nice parts I got. I Bought them in Germany to save about half the money of what it would have cost in Denmark. All the parts fitted perfectly. ![[Image: AEU86 AE86 - Another danish restoration]](https://dl.dropboxusercontent.com/u/18918496/aeu86/23-EngineService/03-IMG_20150124_111152.jpg "AEU86 AE86 - Another danish restoration") The engine bay before doing any cleaning ![[Image: AEU86 AE86 - Another danish restoration]](https://dl.dropboxusercontent.com/u/18918496/aeu86/23-EngineService/04-IMG_20150125_100143.jpg "AEU86 AE86 - Another danish restoration") Parts ready to be cleaned ![[Image: AEU86 AE86 - Another danish restoration]](https://dl.dropboxusercontent.com/u/18918496/aeu86/23-EngineService/05-IMG_20150125_091725.jpg "AEU86 AE86 - Another danish restoration") Parts ready to be cleaned ![[Image: AEU86 AE86 - Another danish restoration]](https://dl.dropboxusercontent.com/u/18918496/aeu86/23-EngineService/06-IMG_20150125_155113.jpg "AEU86 AE86 - Another danish restoration") The new water pump and the timing belt is installed. Just align the dots and you are good to go. The 4AGE engine manual was a big support to me. ![[Image: AEU86 AE86 - Another danish restoration]](https://dl.dropboxusercontent.com/u/18918496/aeu86/23-EngineService/07-IMG_20150127_114736.jpg "AEU86 AE86 - Another danish restoration") A new and fresh engine bay. Lovely. I also decided to paint the valve covers and polish the home made air intake. Also the washer and coolant bottle looks like brand new. I used some odorless petroleum to remove some of the old rust protection goo and soap and hot water to remove the rest. I'm really happy with the result. The car needs to pass MOT by the end of March. Just got the call today. However it shouldn't be any problem now. My next post will properly be the result of the MOT. Other than that I really don't have any plans on the car right now. I guess I'll just have to drive it around once the snow is gone AE86 - 4AGE - 1984 My project - http://www.aeu86.org/viewtopic/another-d...on/t/13190 |
|||
|
|
|
03-28-2015, 08:32 AM
Post: #58
|
|||
|
|||
|
Another danish restoration
Hi all
Just a small update today. I passed MOT the other day :-) So now I'm ready for two more years on the Danish roads. Since I don't have any projects right now there properly won't be any updates for a long time. Until then have a great summer. AE86 - 4AGE - 1984 My project - http://www.aeu86.org/viewtopic/another-d...on/t/13190 |
|||
|
|
|
03-29-2015, 02:34 PM
Post: #59
|
|||
|
|||
|
Another danish restoration
Duze
Where did you get your crankshaft alloy pulley for just a single belt Vs a two rib belt pulley. Thanx Dave |
|||
|
|
|
03-29-2015, 02:47 PM
Post: #60
|
|||
|
|||
|
Another danish restoration
Hi Dave
I bought them from a guy in Austria from this forum. I don't know if he is still active but you could send him a message. The quality is top notch and they really look the business. http://www.aeu86.org/forum/showthread.php?tid=6571 AE86 - 4AGE - 1984 My project - http://www.aeu86.org/viewtopic/another-d...on/t/13190 |
|||
|
|
|
« Next Oldest | Next Newest »
|
| Possibly Related Threads... | |||||
| Thread | Author | Replies | Views | Last Post | |
| Full restoration... | Blade1988 | 64 | 100,684 |
07-17-2016 11:53 AM Last Post: McGlinchey |
|
| '84 ae86 restoration project | HybriD07 | 19 | 30,850 |
10-13-2014 09:20 PM Last Post: HybriD07 |
|
| TOYOTA COROLLA Ke70 - Restoration project | cke70 | 34 | 63,098 |
07-02-2014 10:12 PM Last Post: cke70 |
|
| Black Limited restoration | slpery86 | 6 | 12,015 |
12-17-2013 09:22 PM Last Post: banpei |
|
| A.D.D Performance AE86 RESTORATION NEARLY COMPLETE | cab32 | 24 | 36,640 |
08-08-2013 09:27 AM Last Post: Martynas |
|
User(s) browsing this thread: 1 Guest(s)